
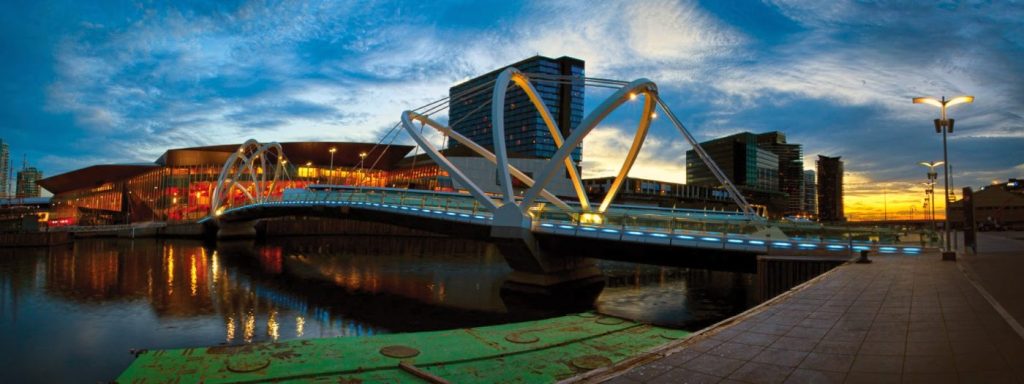
Panoramic photography is a captivating technique that allows photographers to create immersive and awe-inspiring images by stitching together multiple shots of a scene. Whether you’re shooting breathtaking landscapes, cityscapes, or architectural wonders, panoramas offer a unique perspective that can transport viewers into the heart of the scene. In this comprehensive guide, we will explore the art of panoramic photography, providing you with the essential techniques and tips to capture stunning and seamless panoramas.
Equipment and Setup:
The first step in capturing stunning panoramas is having the right equipment and setting it up correctly. A sturdy tripod is essential for keeping your camera stable while you rotate it to capture the different segments of the scene. A panoramic head, which is a specialized tripod head designed for panoramic photography, will allow you to rotate your camera smoothly and precisely.
Essential Tips for Shooting Panoramas:
1. Tripod Stability: Ensure a steady foundation for your camera by using a tripod. This will prevent camera shake and ensure sharp, blur-free images.
2. Wide-Angle Lens: Embrace the expansive nature of panoramas with a wide-angle lens. It allows you to capture a wider field of view, essential for capturing panoramic shots.
3. Manual Mode Control: Take control of your camera’s settings by shooting in manual mode. This provides you with greater flexibility to adjust exposure and white balance for optimal results.
4. Image Overlap: Maintain a consistent overlap between your shots, approximately 30%. This overlap is crucial for seamlessly stitching images together during post-processing.
5. Panorama Head: Consider using a panorama head for precise and smooth camera rotation. It facilitates even stitching and reduces alignment issues.
6. RAW Format: Maximize image quality by shooting in RAW format. RAW files provide ample data, offering greater flexibility for adjustments during editing.
7. Stitching Software: Utilize stitching software, such as Adobe Photoshop or PTGui, to seamlessly merge your shots into a panoramic masterpiece.
Additional Tips for Multi-Row Panoramas:
1. Grid Visualization: Visualizing the scene as a grid helps in planning shots to capture all essential details, especially when shooting multi-row panoramas.
2. Remote Shutter Release: Minimize camera shake by using a remote shutter release. This ensures stability and avoids blurry images.
3. Focus Consistency: Regularly check and adjust focus to maintain sharpness throughout the panorama, avoiding out-of-focus sections.
4. Post-Processing Refinement: Meticulously edit your stitched panorama to remove unwanted elements and fine-tune exposure and white balance. This enhances the overall impact of the final image.
Pan-and-tilt heads
are a type of panoramic head that allows you to rotate your camera both horizontally and vertically. This makes them ideal for shooting multi-row panoramas, which are panoramas that are composed of multiple rows of images.
There are two main advantages to using a pan-and-tilt head for panoramic photography:
- First, they are relatively inexpensive.
- Second, they are easy to use.
However, there are also two main disadvantages to using a pan-and-tilt head:
- First, it can be difficult to align the nodal point of the lens with the center of rotation of the head. This can lead to parallax errors, which are misalignments between the different images in the panorama.
- Second, pan-and-tilt heads are not ideal for shooting multi-row panoramas. This is because it can be difficult to keep the camera level while panning and tilting.
To use a pan-and-tilt head for panoramic photography, you will need to:
- Mount your camera on the pan-and-tilt head.
- Level the camera.
- Rotate the camera to the starting position.
- Take a photograph.
- Rotate the camera to the next position.
- Take another photograph.
- Repeat steps 5 and 6 until you have taken enough photographs to cover the entire scene.
- Use a software program to stitch the photographs together.
Here are some tips for using a pan-and-tilt head for panoramic photography:
- Use a tripod. A tripod will help to keep your camera steady while you are taking the photographs.
- Use a remote shutter release. A remote shutter release will allow you to take the photographs without touching the camera, which will help to avoid camera shake.
- Overlap the images by at least 30%. This will help to ensure that the images are stitched together seamlessly.

FAQs
What three technical issues should be considered when taking pan shots?
Three technical issues to consider when taking pan shots:
- Focal length: The focal length of your lens will affect the perspective of your image and the amount of blur in the background.
- Shutter speed: The shutter speed of your camera will determine how much motion blur is captured in your image.
- Camera movement: The movement of your camera will also affect the blur in your image.
What range of software can one use for panoramas?
There are a variety of software programs that can be used for panoramas.
- Adobe Photoshop is a popular choice for professional photographers because it offers a wide range of features and tools for editing and stitching panoramas.
- PTGui is a specialized panorama stitching software that is known for its ease of use and ability to produce high-quality results.
- AutoStitch is a free panorama stitching software that is a good option for beginners.
Which software you choose will depend on your needs and budget. If you are a professional photographer who needs a powerful and versatile software program, then Adobe Photoshop is a good choice. If you are a beginner who is looking for an easy-to-use and affordable software program, then PTGui or AutoStitch are good options.
What time of day is best for photographing panoramas?
The best time of day to photograph panoramas is during the early morning or late afternoon when the light is soft and warm. This type of lighting will help to reduce the appearance of shadows and create a more even exposure across the entire image. Additionally, the lower sun angle will help to create a more dramatic sense of depth in the image.
Here are some additional tips for photographing panoramas:
- Use a tripod to keep your camera steady.
- Choose a level shooting position.
- Shoot in manual mode so that you have full control over the exposure.
- Use a wide-angle lens to capture a wider field of view.
- Overlap each image by about 30% to ensure that you have enough detail to stitch the images together.
- Use a panorama stitching software program to stitch the images together.
What are the advantages and disadvantages of using a pan and tilt head for panoramic photography?
Advantages of using a pan and tilt head for panoramic photography:
- Relatively inexpensive
- Easy to use
Disadvantages of using a pan and tilt head for panoramic photography:
- Can be difficult to align the nodal point of the lens with the center of rotation of the head, which can lead to parallax errors
- Not ideal for shooting multi-row panoramas, as it can be difficult to keep the camera level while panning and tilting
Gear is good to have for Panoramic photography?
Here is a list of gear that is good to have for panoramic photography:
- A sturdy tripod. A tripod will help to keep your camera steady while you are taking the photographs.
- A pan-and-tilt head. A pan-and-tilt head will allow you to rotate your camera around a fixed point, making it easy to take multiple photos that overlap slightly.
- A remote shutter release. A remote shutter release will allow you to take the photographs without touching the camera, which will help to avoid camera shake.
- A lens with a wide field of view. A lens with a wide field of view will allow you to capture more of the scene in each photograph.
- A software program for stitching the photographs together. There are many different software programs available for stitching panoramic photographs together. Some popular options include Adobe Photoshop, PTGui, and Hugin.
Additional gear that may be useful for panoramic photography:
- A nodal point slide. A nodal point slide will help you to align the nodal point of the lens with the center of rotation of the head. This will help to reduce parallax errors.
- A leveling base. A leveling base will help you to keep the camera level while panning and tilting.
- A graduated neutral density filter. A graduated neutral density filter will help to balance the exposure of the sky and the foreground in your panoramic photographs.
Conclusion: Capturing stunning panoramas requires a combination of technical expertise and artistic vision. By embracing these techniques and refining your composition skills, you can create awe-inspiring images that transport viewers to the heart of your photographic journey.